How to Make Bath Bombs : 5 Easy Recipes
Published on March 11th 2015 by Papiya Dutta under DIY
Bath bombs offer a rejuvenating bathing experience after a long and tiring day’s work. Though decent varieties are readily available in the market, if you want them to be stuffed with your favorite items then what better way than to prepare them at home?
Making Your Own ‘Lush’ Bath Bombs with Essential Oils
Baking soda is an important constituent in making all types of bath bombs since its reaction with any acid is responsible for the bubbles of carbon dioxide in water. Now, who doesn’t love the luxurious bath bombs from Lush? Here comes a cheaper alternative.
Ingredients
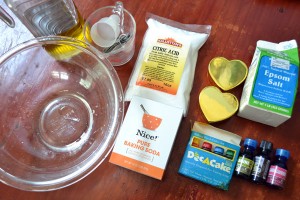
- 2 cups baking soda
- 1 cup powdered citric acid
- 1 cup of Epsom salt
- Water
- Any light vegetable oil (extra-virgin olive oil or coconut oil works well) or glycerin
- Food coloring (optional)
- 1 tsp skin-safe essential oils of your choice
Tools – Plastic molds, whisk
Instructions
- Combine the dry components in a bowl, until there are no lumps.
- In a separate bowl, add 2-3 tsp essential oils to 3 tbsp of the vegetable oil. Then add 1 tsp water.
- Blend the liquids, 1 tsp at a time with the dry mixture using the whisk.
- If it starts to fizz, add the dry ingredients to the fizzing parts to slacken the chemical reaction.
- Whisk in the food coloring. After throrough combining, the mixture should ideally resemble slightly damp sand. It should squish in your hands without crumbling.
- If it doesn’t behave as expected mix in some more dry or wet components as required.
- Use a single drop of vegetable oil to grease the insides of each mold before heaping them up with the mix. Apply pressure from the top to make everything stick together.
- Flip the molds over and gently squeeze the sides to let the shaped contents out.
- Lightly tap them with a paper towel to soak in some of the moisture before leaving them to dry overnight.
These are suitable for vegans and should be used within six months.
Tips
- If you want to keep it all natural, you can replace the citric acid with lemon juice. Just mix it well with the wet materials in step 2.
- Adding 3 tbsp kaolin clay to the dry ingredients is great for sensitive skin and helps to bind the bath bomb mix together.
- If you want it without the Epsom salt, any bath salt will do.
- To treat cough and cold leave out the citric acid and vegetable oil. Instead, add 20 drops of each of eucalyptus and peppermint essential oils along with 1 tsp powdered menthol crystals to the final bath bomb mixture. However, you need to check with a qualified medical practitioner or aroma therapist before using these on children.
How to Make Fizzy Bath Bombs without Citric Acid
If you do not find citric acid, consider substituting with cream of tartar. That way, you are also making the recipe safe for kids, in case you involve them in the making.
DIY Moisturizing Bath Fizzies with Milk
Ingredients
- 1 cup baking soda
- ¾ cup powdered citric acid
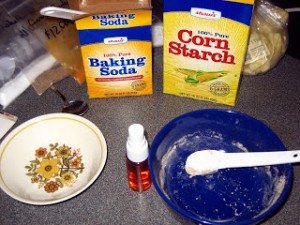
- ½ cup cornstarch
- 1/3 cup powdered milk
- ¼ cup finely ground sea bath salt
- 1 tbsp sweet almond oil
- 1 tbsp grape seed oil
- 1 tsp cocoa butter
- 1 tsp shea butter
- 1 tsp essential oil
- Witch hazel and floral water mix in a fine mist spray bottle
Instructions
- Mix the dry components thoroughly in a bowl.
- Excepting the witch hazel transfer the wet ingredients to a microwave safe bowl. Since the cocoa and shea butter are likely to be in solid form, liquefy the mixture by nuking the bowl for 1 minute.
- Let it cool for some time so it doesn’t burn your hands.
- Drizzle the wet mixture slowly into the dry one. Combine them nicely.
- Spray the witch hazel for a few times and mix. At this point, the mixture should be wet enough to be molded but not too wet and sticky.
- Pack the molds tightly with the mixture.
- Overturn the molds over a cookie sheet. You might need to tap a little to release their contents.
- Lightly spray the witch hazel and floral water concoction. Let them dry overnight.
Other than being beneficial to the skin, including cornstarch in your recipe makes the bath fizzies to float.
Cupcake Bath Bomb Recipe without Cornstarch
Ingredients
- Warm distilled water
- 1 ½ cups of baking soda
- ½ cup of citric acid
- 2 to 3 tbsp of almond/rice bran/grape seed oil
- ¼ tbsp of cream of tartar
- 2 ½ tbsp of meringue powder
- 1 ½ cup of powdered sugar
- 4 to 6 drops of scent
- Glitters
Tools – Muffin molds and tray, cake blender, piping bags, spray bottle
Instructions
- Mix baking soda and citric acid in a glass bowl to prepare a smooth powder. Add the oil and scent into the powdered mixture.
- Spray the mixture with distilled water while stirring it until a wet dough-like material is formed. Fill the muffin molds with the dough.
- For the frosting, add meringue powder, cream of tartar, sugar, and water in a separate bowl.
- Using the cake blender mix all the ingredients uniformly.
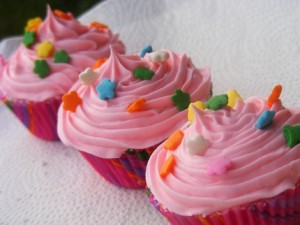
- Take out the fluffy product and put it in piping bags. Use it to put an icing on the dough in muffin molds. Add glitters on the top.
- Keep the muffin tray in the refrigerator for three days.
- Take out the cupcake bath bombs from the molds and pack them in dry plastic bags.
Tip
Throw in 10-15 drops of vanilla essential oil or fragrance for a yummy smell.
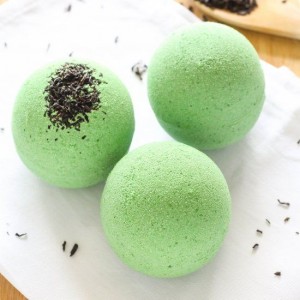
Homemade Natural Bath Bombs with Green Tea
Ingredients
- 1¼ cup baking soda
- ½ cup citric acid
- 2 tbsp jojoba or apricot kernel oil
- Boiling water
- 4-6 drops green soap coloring (optional)
- 2 tbsp green tea leaves
- Essential oils
Instructions
- Excepting the green tea leaves, combine the dry components well in a bowl.
- Pour the oil and mix well to moisten uniformly. Stir in 1-10 drops of essential oils.
- Pour ½ tbsp of the water over the leaves to moisten them. They should expand in size. Toss them into the mixture.
- You can either use your hands to roll it into balls or use molds.
- Place each bath bomb on a sheet of parchment or wax paper on a flat surface.
- Leave them undisturbed for drying.
Depending on the humidity they can take about a week to dry completely. You can hasten the process by placing them in the oven at a very low setting for a few hours.
Things to Note
- Those who do not want to add food coloring might like to incorporate 1/4 cup oatmeal to the dry components to give the bath bombs a plain cream and white shade.
- If you do not want to use essential oils, substitute with fragrance oils of your choice.
- If you want the bombs to fizz longer, store them in airtight containers. That way they last for a month. Leaving them in the open make them last for just about a week.
- Give a healing touch to your bath bombs by including an ounce of raspberry seed oil. It prevents aging and dryness, protects your skin while providing excellent antioxidant
Cool Bath Bomb Ideas
- For Christmas, make delicious smelling gingerbread bath bombs using gingerbread molds, with ginger, cinnamon, clove and nutmeg essential oils.
- Adding about 25 grams of the dried lavender flowers or rose petals to the bath bomb mixture lends a lovely floral look and aroma.
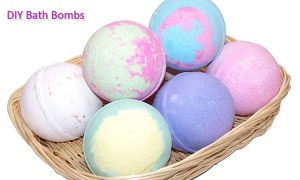
- Try different tints of food coloring to easily turn the recipe into fabulous rainbow bath bombs.
- Wrapping with clear cellophane paper and tying with raffia makes them transform into sizzling party presents. You can decorate with a neatly done up bow with a card listing the ingredients and directions for use.
- Topping them with chocolate before placing in candy boxes makes them resemble yummy truffles.
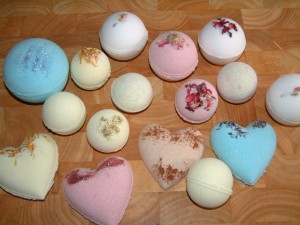
- Be innovative by playing around with different ideas of molds. While the spherical ones make splendid bath balls, rose shaped bath bombs befit a Valentine Day gift. Mini heart bath bombs or large round bath cookies can make kids happy.
- Instead of molds, you can use an ice cream scoop to extract the bath bomb dough onto a dish. Refrigerate the dish for 15-30 minutes before starting the drying process. Be creative by gifting them in ice cream cones.
The step-by-steps offer you cheaper organic means to have a luxurious spa-like treatment at home. Make Mother’s Day or your best friend’s birthday party memorable with these extra-fizzy gifts.
One thought on “How to Make Bath Bombs : 5 Easy Recipes”
Leave a comment
Popular
 DIY: Healthy Homemade Cat Food Recipes
Give occasional treats to your loving pet cat with the best nutritious homemade dishes, rather […]
 How to Lighten Hair Naturally
Best homemade recipes for making your own natural hair lighteners! Try making your own hair […]
 9 Best Homemade Natural Mouthwash Recipes
Smile more; talk more to your friends confidently trying these mouthwash recipes! Bad breath is […]
Prepare your own tooth powder at home for healthy gums and teeth. The recipes given […]
As the name suggests, wool dryer balls serve the same purpose as plastic PVC or […]




Those bombs look like da bomb!!! Do you think you use tapioca starch or arrowroot in place of the corn starch?
Thank you!